
Embroidery Digitizing is an important process that turns artwork, logos, names, or other designs into instructions that an embroidery machine can understand. Although the finished embroidery may look simple, creating a clean and professional design requires planning, technical knowledge, and attention to detail.For beginners, learning the basics can make the entire process much easier.
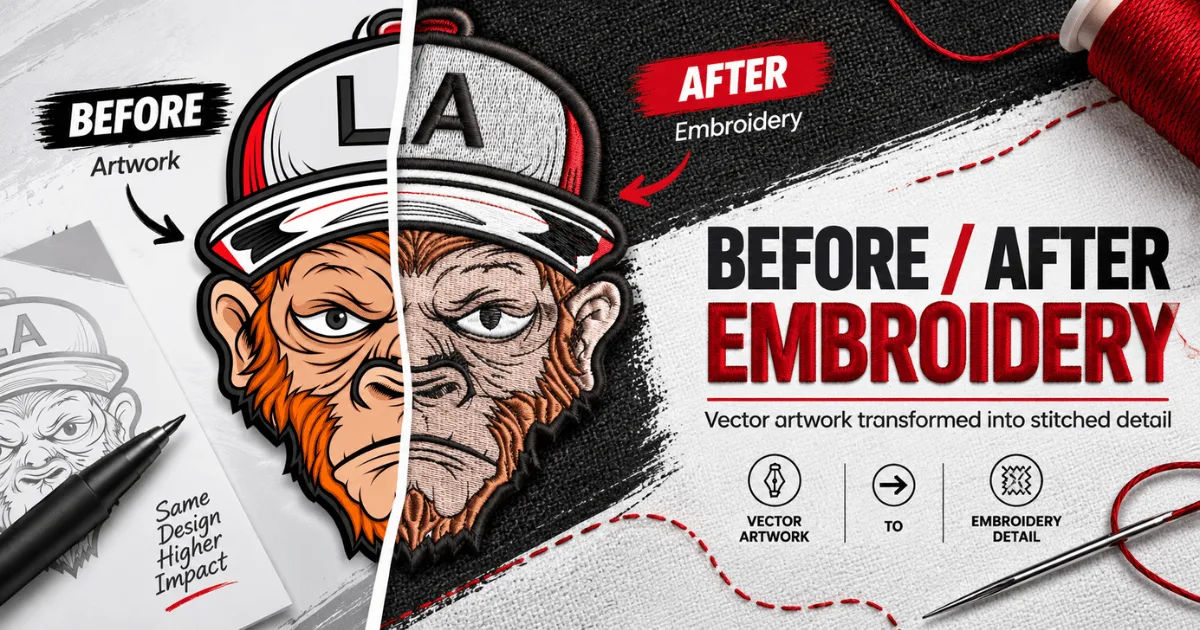
Understanding stitch types, fabric behavior, thread selection, design settings, and machine limitations helps prevent common problems such as thread breaks, gaps, puckering, and poor-quality lettering.
Whether you want to digitize designs as a hobby, create branded clothing, or build a professional embroidery business, learning the fundamentals is a useful first step.
What Is Embroidery Digitizing?
Embroidery Digitizing is the process of converting a digital image into a stitch-based file that an embroidery machine can read. Unlike a normal image file, an embroidery file contains information about how the machine should create the design.
The file can tell the machine where to place stitches, which direction they should follow, when to stop, and when to change thread colors.
A common mistake among beginners is thinking that digitizing simply means converting a JPG or PNG file into an embroidery format. In reality, the process involves much more.
A digitizer must decide how different parts of the artwork will be stitched. They also need to consider the fabric, thread, design size, stitch density, and the order in which individual elements are embroidered.
Why Is Digitizing Important?
A good design file has a major effect on the quality of the final embroidery. Even a high-quality logo can produce poor results if it is digitized incorrectly.
Proper digitizing helps create smooth edges, consistent stitching, readable lettering, and balanced coverage.
It can also reduce unnecessary thread changes and prevent problems during production. This becomes especially important when producing large numbers of shirts, jackets, caps, uniforms, or promotional products.
A professionally prepared file can also work more efficiently on an embroidery machine, saving time and reducing material waste.
How Does the Digitizing Process Work?
The process normally begins with artwork. This may be a company logo, illustration, text, or another graphic.
The artwork is examined to determine which areas should be embroidered and how they should be represented with stitches.
Preparing the Artwork
The quality of the original artwork matters. Clear artwork makes it easier to identify shapes, outlines, colors, and small details.
Simple vector artwork is often easier to work with because its shapes can be adjusted without losing quality. However, raster images can also be used when they are clear enough.
Beginners should avoid automatically tracing every tiny detail. Some details that look good on a screen may become unclear when converted into thread.
Choosing Stitch Types
Different areas of a design require different stitch types.
Running stitches are commonly used for thin lines and fine details. Satin stitches are useful for borders, lettering, and narrow shapes. Fill stitches are generally used for larger areas.
Choosing the right stitch for each element helps the embroidery look more natural and professional.
Setting Stitch Direction
Stitch direction affects the appearance of embroidered surfaces. Changing the direction can create visual texture and help different parts of a design stand apart.
For example, two neighboring areas may look better when their stitches run in different directions.
Poor stitch direction can make a design appear flat or uneven. It may also cause excessive tension in certain areas.
Setting Stitch Density
Stitch density refers to how closely stitches are placed together.
Too little density can leave gaps and allow the fabric to show through. Too much density can make the design heavy, stiff, or difficult to embroider.
The correct density depends on several factors, including the fabric, thread, stitch type, and design size.
Understanding Common Stitch Types
Beginners should become familiar with the three main stitch categories.
Running Stitch
A running stitch is made with a continuous line of stitches. It works well for outlines, small details, and thin designs.
Because it uses relatively little thread, it can be useful when creating delicate elements.
However, running stitches are not suitable for filling large areas.
Satin Stitch
A satin stitch consists of closely arranged stitches that generally run from one side of a shape to the other.
It is frequently used for lettering, borders, and narrow shapes.
Satin stitches can produce a smooth and attractive finish, but their width needs to be considered carefully. Extremely wide satin columns may not stitch properly without additional planning.
Fill Stitch
Fill stitches cover larger areas with rows of stitching.
They are commonly used for backgrounds, large letters, and broad shapes.
Fill stitches require careful planning because excessive density or poor underlay can make the finished material heavy and cause distortion.
What Is Underlay?
Underlay is a foundation layer placed underneath the visible stitches.
It helps stabilize the fabric and provides support for the top stitching. Different underlay methods may be appropriate for different materials and shapes.
For beginners, underlay can seem unnecessary because it is often hidden beneath the finished design. However, it can have a major impact on embroidery quality.
Without suitable support, stitches may sink into the fabric, edges may become uneven, and coverage may not look consistent.
Why Fabric Matters
One of the most important lessons in Embroidery Digitizing is that a design cannot always be used exactly the same way on every fabric.
A cotton T-shirt behaves differently from denim, fleece, leather, or a cap.
Stretchy materials can move during stitching and may require stronger stabilization. Thick fabrics may require different settings from lightweight materials.
This means the digitizer should know where the design will be embroidered before finalizing its settings.
Understanding Stabilizers
Stabilizers provide additional support during embroidery.
They help prevent the fabric from moving excessively while the machine is stitching. The appropriate stabilizer depends on the garment and the embroidery method.
Some materials use cut-away stabilizers, while others may work well with tear-away options. Water-soluble stabilizers can also be useful in specific situations.
Using the wrong stabilizer can contribute to puckering, shifting, poor registration, and distortion.
The Importance of Design Size
Design size has a direct effect on stitch quality.
A design that looks excellent at one size may not work properly when significantly enlarged or reduced.
Small designs are particularly challenging because tiny details may disappear. Very small lettering can become difficult to read when converted into thread.
Beginners should simplify complicated artwork when creating small embroidery designs rather than trying to preserve every original detail.
Small Text Is Challenging
Text is one of the most common elements in embroidery, but small lettering can be difficult.
Letters need enough space for the stitches to form recognizable shapes. If they are too small or densely stitched, individual letters may merge together.
Font selection also matters. Simple, bold fonts are often easier to embroider than extremely thin or decorative fonts.
Testing lettering before production can help identify readability problems.
Understanding Pull and Push Compensation
Fabric and thread can move during embroidery. Stitching may pull some areas inward or cause other elements to expand.
Pull compensation is used to account for this behavior and help maintain the intended shape.
Beginners do not need to master every technical setting immediately, but they should understand that the design displayed on a computer screen may not behave exactly the same way when stitched onto fabric.
Experience and testing are important for learning how different settings affect the finished product.
Choosing the Right Thread
Embroidery thread is available in different materials, weights, and finishes.
Polyester thread is widely used because it is durable and generally handles regular washing well. Rayon thread is also known for its attractive shine and is commonly used when appearance is a priority.
Thread weight can affect the level of detail that a design can hold.
Using suitable thread and matching it with appropriate machine settings can improve both appearance and production reliability.
Understanding Embroidery File Formats
Embroidery machines use specialized file formats.
Different machine brands may require different formats, so beginners should determine which format their machine supports before saving the final design.
The native working file is also important. It allows the digitizer to make future changes to stitch settings, sizes, colors, and other design elements.
Simply keeping the machine-ready file may make later editing more difficult.
Why Testing Is Essential
Never assume that a design will work perfectly just because it looks good on a computer.
A test sew-out can reveal problems that are difficult to notice on screen.
During testing, check the stitching order, thread tension, lettering, outlines, registration, density, and overall appearance.
Testing is especially important when working with unfamiliar fabrics or new design styles.
Common Mistakes Beginners Should Avoid
There are several mistakes that new digitizers commonly make.
Using Too Many Details
Trying to preserve every detail from an original image can create an overcrowded design.
Some details need to be removed or simplified so the embroidery remains clear.
Using Excessive Stitch Density
More stitches do not always mean better embroidery.
Too many stitches can increase production time and make the fabric stiff. They can also increase the possibility of thread breaks.
Ignoring Stitch Order
The order in which elements are stitched affects the final result.
Poor sequencing can create unnecessary jumps, gaps, or registration problems.
A well-planned sequence can make production smoother and more efficient.
Skipping the Test Sew-Out
Skipping testing is risky, particularly for important orders.
A few minutes spent testing can prevent the cost and frustration of producing multiple defective garments.
What Software Do Beginners Need?
Embroidery software allows users to create, edit, and organize stitch designs.
Different programs offer different levels of automation and control. Some beginner-friendly programs provide basic tools, while professional software offers detailed control over stitch parameters.
Automatic digitizing features can be useful for simple artwork, but they should not replace human judgment.
Automation may produce a starting point, but the resulting design often needs manual adjustments to achieve professional quality.
How Can Beginners Learn Embroidery Digitizing?
The best way to learn is through a combination of study and practical experience.
Start with simple shapes, basic lettering, and uncomplicated logos. Learn how running, satin, and fill stitches behave before moving to complex artwork.
Practice on different fabrics and compare the results.
It is also useful to study professionally digitized designs. Examine their stitch directions, sequencing, density, underlay, and use of different stitch types.
Over time, repeated testing will help develop an understanding of how digital settings translate into physical embroidery.
Should Beginners Digitize Their Own Designs?
Learning to digitize designs yourself can be rewarding, especially if you plan to work with embroidery regularly.
It gives you greater control over the final product and allows you to make changes without relying on another person.
However, professional digitizing can be a better choice when a project involves complex artwork, tight deadlines, expensive garments, or large production quantities.
A poorly prepared file can waste thread, fabric, time, and money.
Tips for Better Results
Beginners can improve their results by following a few basic practices.
Always start with clear artwork and choose a suitable design size. Keep the fabric in mind when selecting stitch settings.
Avoid unnecessary details, use appropriate stitch types, and plan the stitch sequence carefully.
Use suitable stabilizers and test the design before beginning full production.
It is also important to save editable working files. This makes it easier to adjust the design later for different sizes, fabrics, or garments.
Most importantly, do not expect perfect results immediately. Embroidery is both a technical and creative skill.
When Should You Hire a Professional?
Professional help can be useful when a design contains complicated artwork, gradients, tiny text, detailed illustrations, or many overlapping elements.
A professional digitizer understands how to convert visual artwork into stitches while considering fabric behavior and machine limitations.
For businesses, outsourcing can also save time. Instead of spending hours learning software and correcting problems, a business can focus on production and customers.
The decision depends on budget, project complexity, required quality, and how frequently embroidery files are needed.
Conclusion
Learning Embroidery Digitizing becomes much easier when beginners understand that it is more than simply converting an image into an embroidery file. It is a process of translating artwork into carefully planned stitches that work with a particular machine, thread, fabric, and design size.
The most important concepts to learn first are stitch types, stitch direction, density, underlay, sequencing, stabilization, and fabric behavior. These elements work together to determine how the final embroidery looks and performs.
Beginners should start with simple designs rather than immediately attempting complicated logos or detailed artwork. Simple projects provide an opportunity to understand how individual settings affect the finished result.
Testing is equally important. A computer preview cannot always predict exactly how thread will behave on fabric. A test sew-out can reveal issues with registration, lettering, density, tension, and stabilization before a full order is produced.
Good Embroidery Digitizing also requires patience. Developing professional skills takes practice because every fabric and design can behave differently. Mistakes are part of the learning process and can provide valuable information about what needs to change.
With consistent practice, careful testing, and a good understanding of embroidery fundamentals, beginners can gradually produce cleaner, more reliable, and more professional designs. Whether the goal is personal creativity or professional embroidery work, learning these basics creates a strong foundation for future improvement.